
Upgrading the Firmware of the DG824M internal PCMCIA card
This article shows what I did when upgrading the internal PCMCIA card firmware for the Netgear DG824M. Please note however that I would strongly advise that you think carefully about doing this as it will certainly invalidate your warranty. I'm just showing something I did here, and am making no recommendation that you do the same.
WARNING: You could seriously muck up your DG824M - don't contact me if everything goes wrong! I'd advise that you stick with your factory setup, and just look at the pretty pictures below! :-)
For those with an interest in how I did things however, here's the stages:
Removing the PCMCIA card
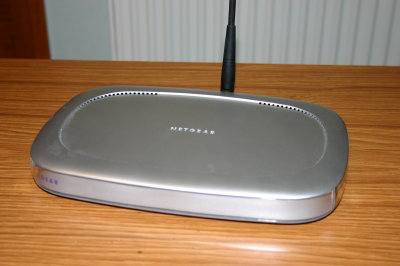
- First take your Netgear DG824M ADSL router.
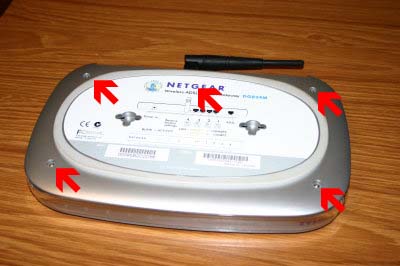
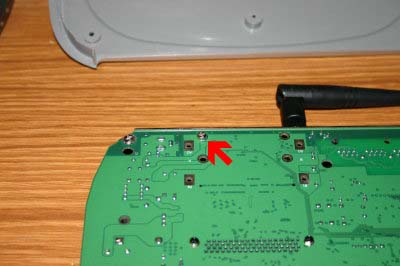
- There are five screws on the base of the DG824M that secure the case. Four are visible, however the fifth one is underneath the 'G' of the netgear logo, and you will have to cut through with a sharp knife. Note that by cutting through the label you have probably invalidated your warranty, so I wouldn't bother sending it back to Netgear after this.
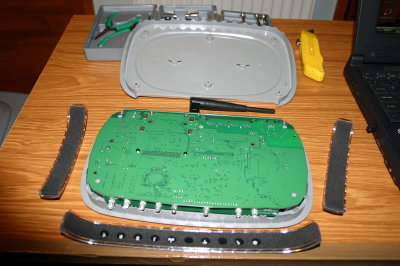
- Once open the top and bottom will come away easily - the sides and front plate also just come to pieces as well - don't worry, they go back together easily. The green circuit board containing all the electronics can easily be removed - there are no other retaining screws.
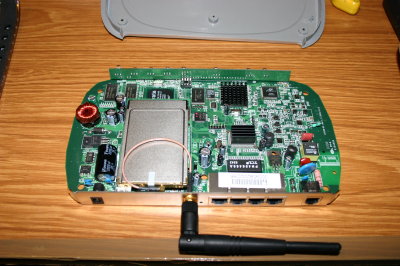
- You can now see the PCMCIA card in the netgear.
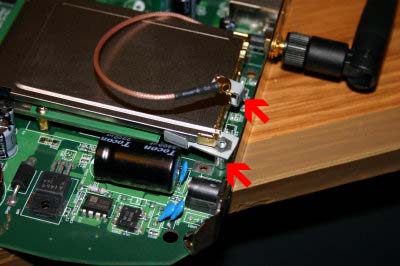
- The connector for the aerial is easily removed. I just used a small screwdriver to prize it away from the card - it just popped out.

- The PCMCIA card is actually held in place by a bracket. In order to remove the card, this bracket needs to be unfastened as well. To do this there is a retaining screw on the underside of the circuit board.
- When the retaining screw is removed the bracket is then loose, and this will allow you to remove the card. When removing you need to be very careful to ensure that you don't bend any of the connector pins. You may need to lift the card slightly to get the bracket out.
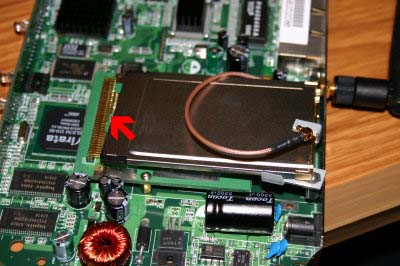
- These are the pins - once free the card can be completely removed from the Netgear chassis.
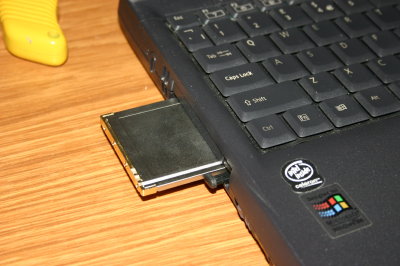
- Now it's just a case of inserting the card into your laptop PCMCIA slot and following the instructions for upgrading the firmware.
Installing the firmware
- Download the following files onto your laptop:
- http://www.zcomax.co.uk/drivers/zcomax/nb325_D&U_407.exe (PCMCIA Card Driver)
- http://linux.junsun.net/intersil-prism/WinUpdate-0-7-0.exe (Flash Utility)
- http://www.netgate.com/support/prism_firmware/primary.tar.gz (Primary Firmware Archive)
- http://www.netgate.com/support/prism_firmware/1.8.0.tar.gz (Secondary Firmware Archive)
- http://www.zcomax.co.uk/drivers/zcomax/nb325_D&U_407.exe (PCMCIA Card Driver)
- Windows should bring up a "New Hardware Found" dialog.
- Install the drivers card using the downloaded file.
- Extract out pk010101.hex from primary.tar.gz and sf010800.hex from 1.8.0.tar.gz. Note is is vital that the first two letters match the first two letters of the existing firmware in the card
- Install and run WinUpdate.
- To the firmware listbox, add both the pk010101.hex file and the sf010800.hex file and then upload the firmware. (WARNING! Both the Primary and the Secondary Firmware MUST be uploaded at the SAME TIME)
- Once completed, close the software and then remove the PCMCIA card.
- Place the card carefully back into the PCMCIA adapter within the DG824M and reconnect the metal holding bracket (Can be fiddly!).
- Reconstruct the rest of your DG824M - basically follow the instructions above, but in reverse!
Most of this information was taken from a post on www.thinkbroadband.com when it was still known as www.adslguide.org.uk. The original post is no longer available on this site unfortunately - not sure if anyone knows of an archive copy of it... - all the technical firmware information was on this site - so thanks to everyone who contributed to it! If you want to contact me with questions - online contact form.